2 days before leaving and spending a lot of time figuring out my packing logistics, I figured I should probably also mount up the bicycle I was planning to take both on this trip, and my extended June trip. This is a generic China carbon CX frameset, configured with hydraulic disc brakes and ultra low gearing (44/30 + 10-42 cassette!) – the main difference between this and my Parlee is the thru-axle fork configuration. The 2×2 rack is transformable for both QR & Thru-axle, so I didn’t think too much of it.
One thing to address right away is ensuring I had a disc brake spacer to avoid compressing the pads together on accident. So tossed an extra spare one into my spare bag, this also adds a setup/tear down step.
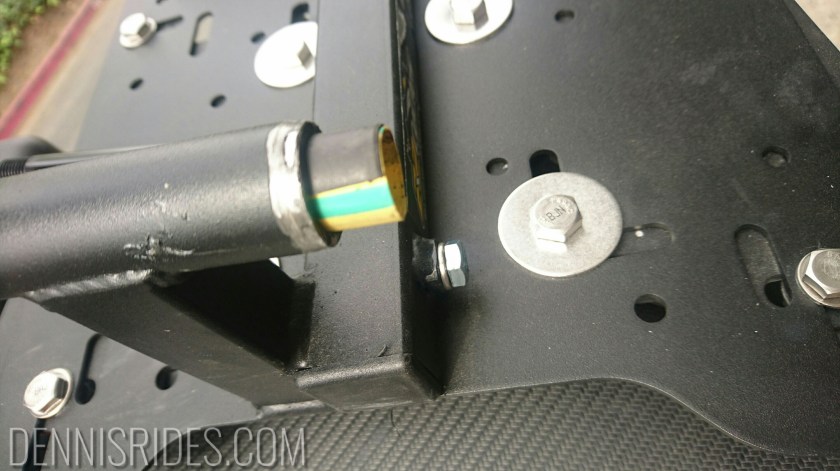
Next up, I went to attach the bike and realized my China fork’s dropout was too small to mate over the outside of the 2×2 rack.
The “shoulder” on the fork was approximately 1.5 mm too narrow to sit nicely on top of the rack.
So, like any good Motorcycle Farkler.. I broke out the Dremel and some sanding discs and ground down the rack “axle” so it would fit. Having a tight interface here is critical to avoid damage to the fork, given all the forces that are going to be put on it.
2×2 rack modification for my Chinese fork
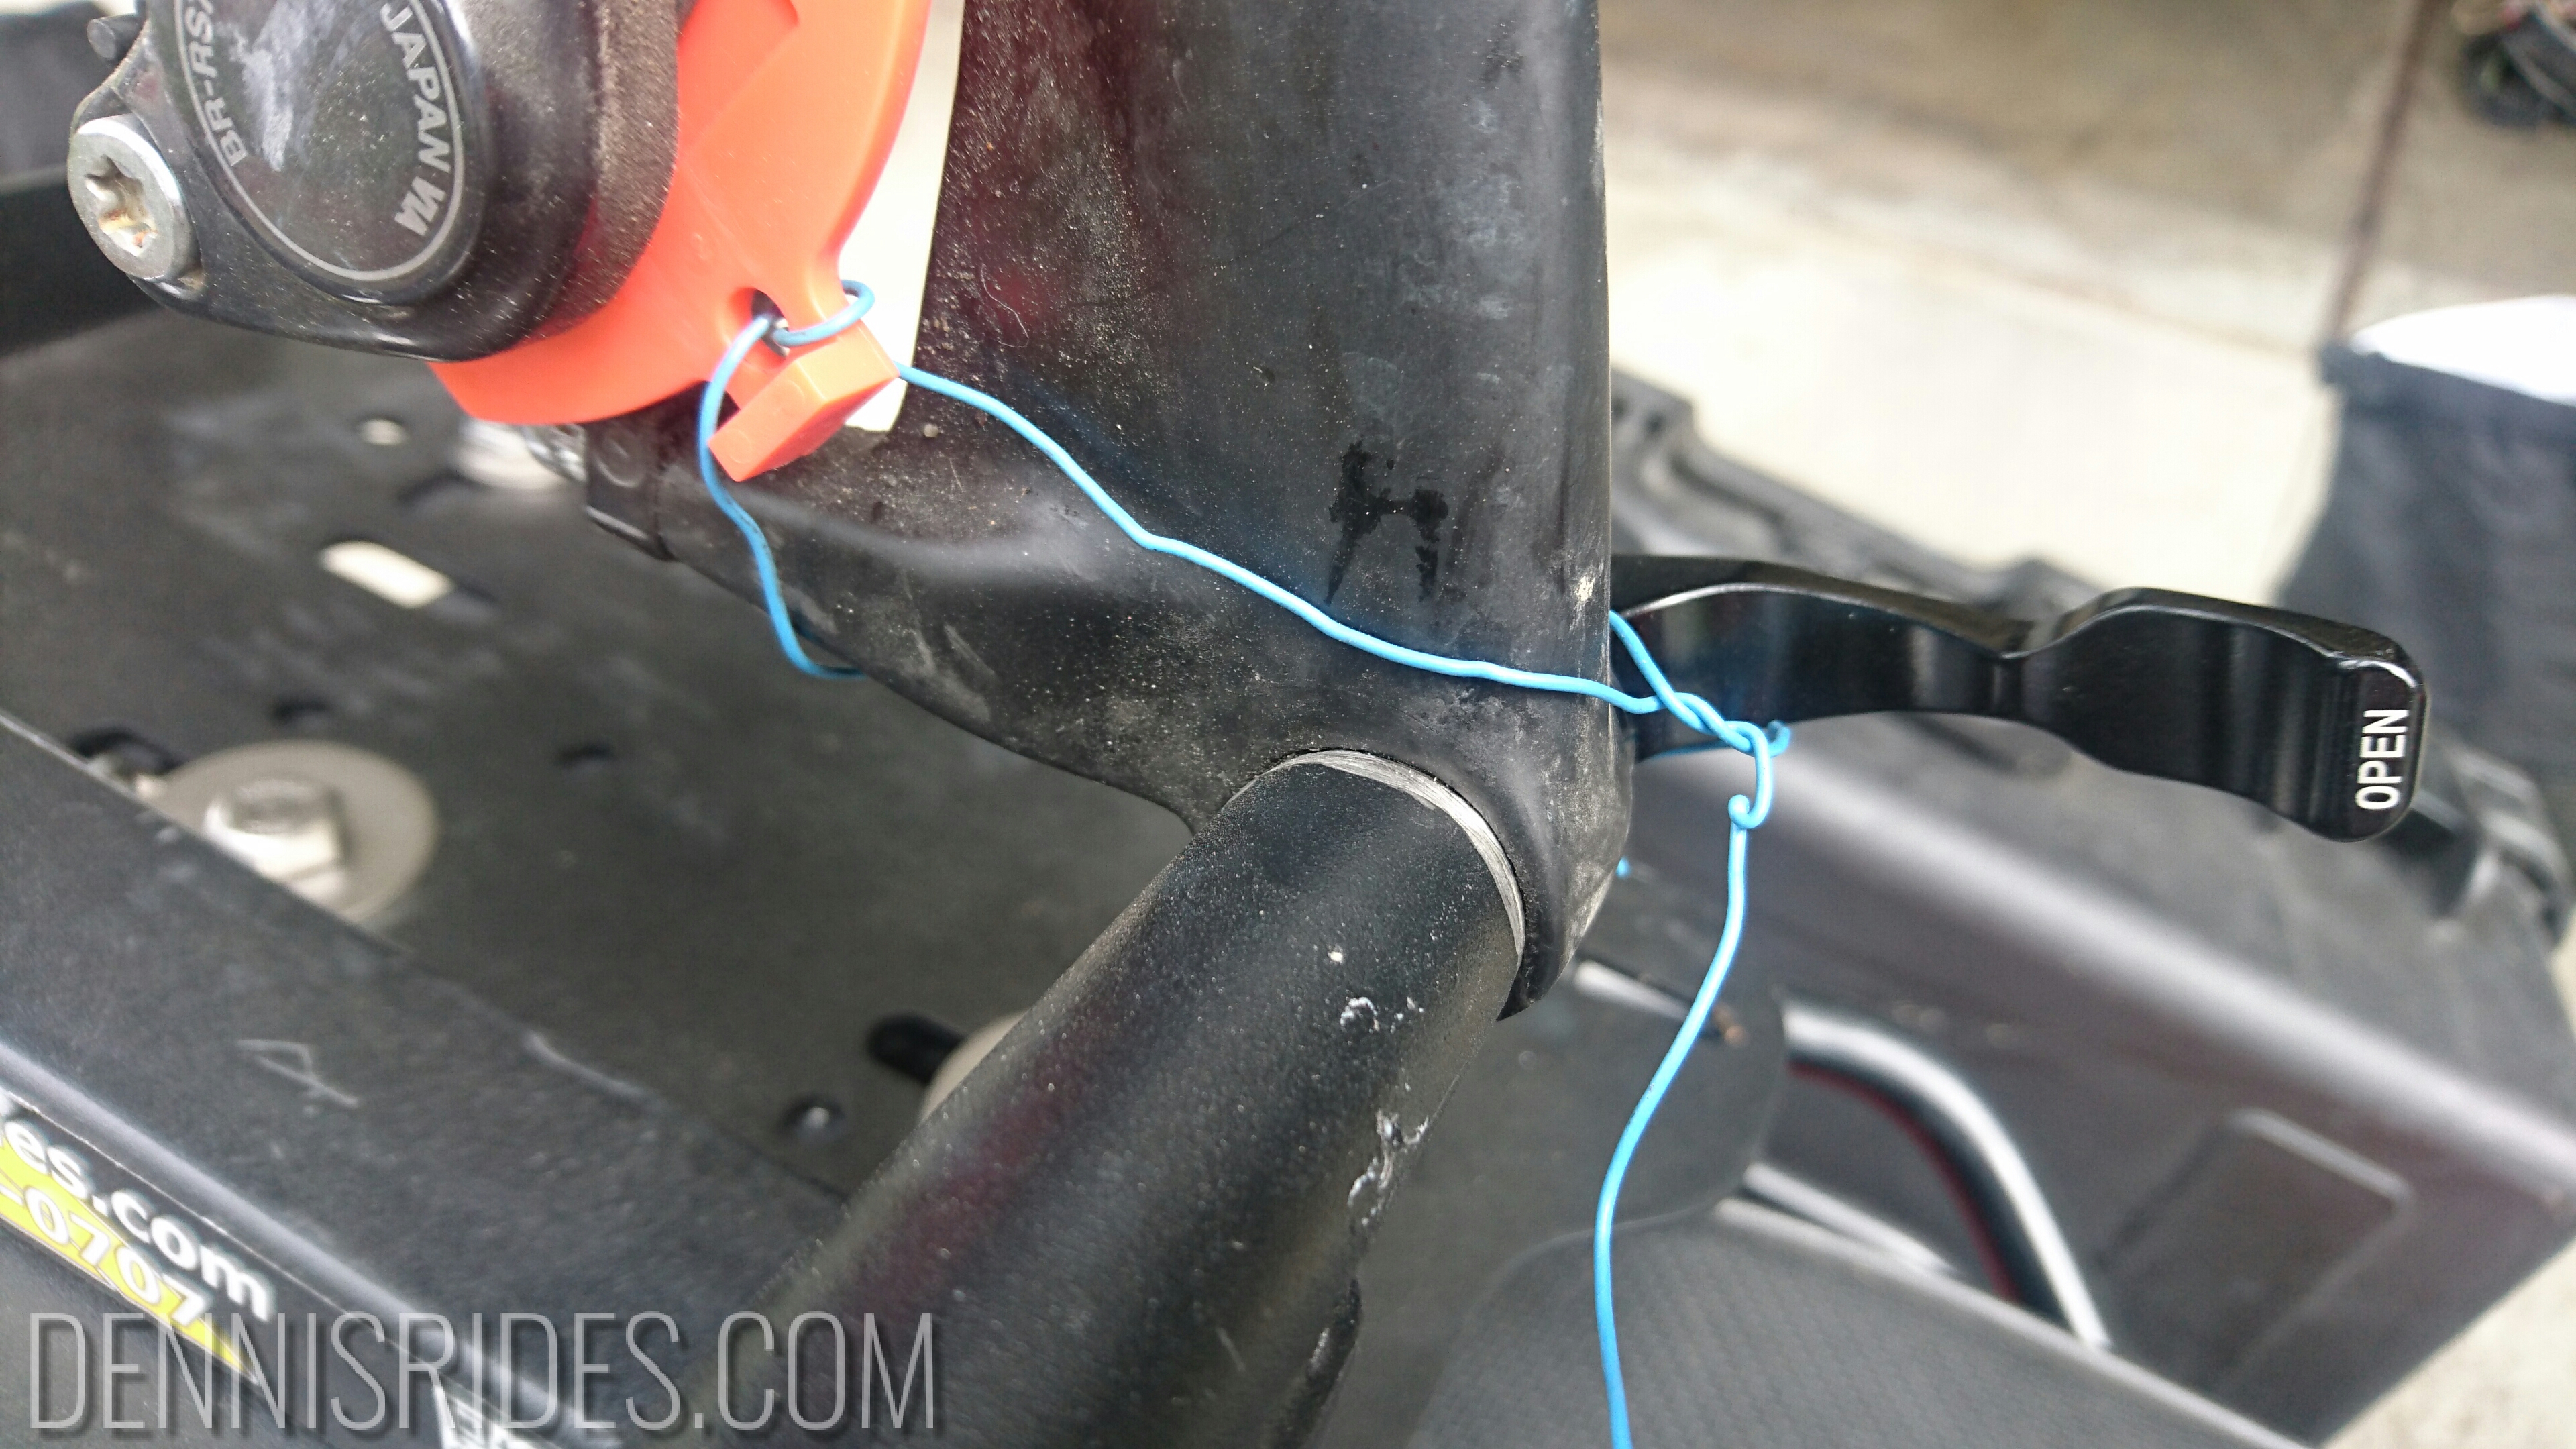
Once I had the fork mounted I gave it a good shake and noticed there was still a fair amount of movement between the rack & the fork dropout. Again, this is the major interface to the bike/rack, so any movement here is a bad thing.
More measuring and it appears my Chinese fork axle is ~14.6mm, and the inside diameter of the bike rack is ~16.6mm. The result is that the axle can “wobble” in the rack, rubbing the dropouts. Time for more Farkle creativity – a layer of heat shrink tubing over the axle, hit it with the heat gun, cooled and sliced off as a spacer.
Heat shrink tubing spacer and ground down “axle” for my fork
This is still not ideal since it is made of rubber, but 48 hours to launch you use what ya got. For my longer trip I will replace with some aluminum can shim or stainless sheet.
Final challenge: Stages power meter lives on the same crank arm that secures the back end of the bicycle. For this I glued & zip tied a few layers of thick rubber as a spacer against the crank arm.
Reviewing PJAMM’s “Top 10o U.S. Climbs” I quickly noticed there’s a bunch that are unlikely to be possible to ride at the height of summer, especially anything in Death Valley. I’ve been through Death Valley on my motorcycle in 2011, as well as riding through once in late Fall and the heat on the valley floor is something difficult to describe. So I mentally crossed these off the plan for June.
However, while I was experimenting with my whole moto-bicycle scheme, some buddies were planning a parallel dual sport motorcycle trip for early March to the same area. And after my successful Diablo ride I needed a longer, multi-day, with camping, multi-point moto-bicycle trip to practice with.. so.. why not leap straight to “difficulty level 10” in logistics and piggy-back onto their trip? That way I have some people in the local area if things go off the rails.
Unfortunately for me, I’ve had a bit of a nagging hip issue for the past month. I’m pretty sure I didn’t injure it while bicycling, since it is barely noticeable while on the bike but it was improving slowly enough it was difficult to say. So, in short, I didn’t decide to go on this trip until a week before launch, and even then I was probably 50/50 until 2 or 3 days before.
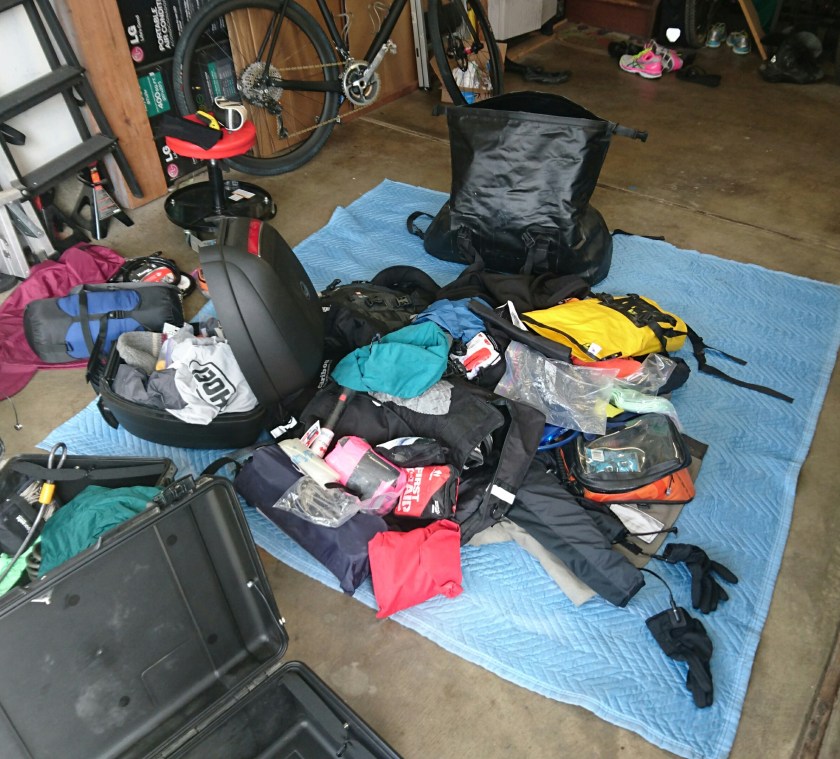
You can see where this is going. One of the biggest challenges of motorcycle-bicycle-camping-extended-trip is packing logistics. Volume is king on the motorcycle, and the bicycle steals both space for bags and adds a lot of volume with shoes, helmet, water bottles, food, etc. Also a small issue was that the bike I plan to take on the trip is not the bike I put on for the Diablo trip..
– it holds everything I need to set up camp – tent, cot, jetboil, camp chair, mini-hatchet, etc. Unfortunately this bag is both too big to comfortably fit behind the bicycle fork, and since it is a top roll, “transformation time” would be extended. Given the kit I had available due my last minute decision, I rolled with my Kriega US20. This held my spare motorcycle tube, pump, and first aid kit, in addition to the items I would use while bicycling: Pacsafe squid, stuff sack for my motorcycle gear, bicycle shoes, hydration pack, bicycle tail pack with tube/spares/etc, bicycle handlebar bag with food, emergency beacon, glow stick, water filter, e-blanket, etc.
With so much loss of volume, my “luxury camping” gear went out the window – no tent, no stove, no camp chair. I figure combining bicycling and motorcycling doesn’t leave much time for camp setup/tear down anyways, so going for speed here is probably more realistic.
– if you’re a side sleeper, this is THE camp bed to have. I wake up stiff and crippled on anything else (and I’ve tried plenty!)
So what I was left with:
Kriega across the top plate: Motorcycle tube/pump & first aid kit, bike shoes, Pacsafe, gear stuff sack, hydration pack, bicycle tail & handlebar pack.
Right case, day-to-day stuff: clothes bag, bicycle kit bag, bike helmet filled with ride stuff (bike computer, HR strap, gloves, skull cap, etc.), bicycle tools/spares/batteries/etc, bath & hygiene stuff. I also put my water bottles for the bicycle in here since there was room to keep them upright and not leaking all over.
Tank bag (Giant Loop Diablo – Amazon) – Usual ride-all-day stuff: hat, sunscreen, bug repellant, ibuprofen, chapstick, camping headlamp, etc. This also holds my CamelBak hydration bladder, which during bicycling with no water available will transfer into my hydration pack.
So, the bicycle transformation plan with this kit:
Remove & assemble bicycle
Kriega
Remove Pacsafe & stuff sack for motorcycle gear
Pull out hydration pack
Attach tail pack & or front pack to bicycle
Pull out bike shoes
Side case
Remove helmet & gloves/windbreaker/etc
Pull hydration bladder from the tank bag and put into hydration pack
Put tank bag where the helmet was in the side case
Attach water bottles to bicycle
Clothing dance
Jacket into stuff sack. Stuff sack + pants + boots into Pacsafe, secure to motorcycle with cable & lock
Well, this goes back a bit. I’ve been motorcycling for a while. I’ve been bicycling for a while. ~5 years ago, I spent 4 weeks riding my motorcycle around Canada and Alaska.
As my next 5 year sabbatical approached, I began planning what I thought would be a motorcycle trip down the Continental Divide (from the Canadian border down to Mexico.)
I also started recovering from my latest injury and began bicycling more, culminating in participating in a local hill climb series (shout out to Low Key Hill Climbs!) as well as dropping the latest 30 pounds I gain every time I get injured.
I figured I should use my current cycling form for something, and decided I should at least ride all the top climbs in California this summer. Which lead to John Summerson’s “Complete Guide to Climbing by Bike” book.
Unfortunately for me, I loathe long car road trips.. but I can ride my motorcycle day after day forever, no problem.
A quick Google for “bike racks for motorcycles” turned up the most excellently engineered 2×2 Cycles Rack and a vague sketch of a plan formed in my mind: I would travel around the western US with my motorcycle AND bicycle. Motorcycle to the foot of a remote climb, switch to bicycle, ride it, then switch back! CRAZY!
Crazy enough people said I should blog about my experiences, including my lovely wife. I don’t do Facebook, my Instagramming is inconsistent, and Strava only covers a small aspect of it. Plus, I’m capturing my own learnings and actions as I go along.
So, here it is… count-down to (probably) June. Please leave a comment if you’re interested in any particular aspect of this craziness!
This is, so far, my deeply thought out plan (each balloon or diamond represents a notable climb.)